So recently I sat down and configured LiF to host on Google Cloud's Infrastructure to host a Dedicated Server for LiF:YO, so far the server is doing very well with traffic (It is on a Google.com Server), and is performing overall very well. First I want to say that I no way represent Google, I am just familiar with their Platform as I use it in the business work for a SaS application called Attendle.
Here are some benefits to using Google Cloud that I have found so far.
- - Unlike the belief it is rather cheap, and is a lot cheaper than a regular barebone dedi.
- You have the ability to handle large amounts to traffic on the upstream and downstream as it is on the Google Network
- With their SQL Engine you can host you LiF:YO DB on their system as well. The SQL Engine provides a fast SQL database, and daily backups plus point in time recovery with their logging.
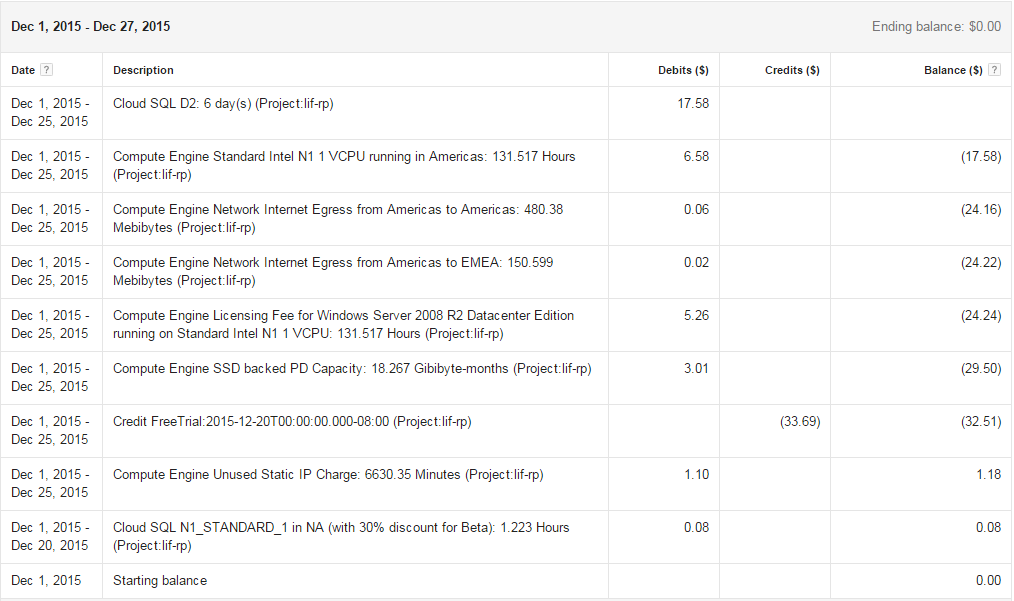
So Next is the cost! Good news is that Google Cloud Offers $300 of credit for 2 Months as a trial period. So if you sign-up under a google email, you can get two months for free with that. Past that the cost break down is like this.
**Prices are different for each example, as it is based on your use and the network traffic/ storage needed.**
- Server VM Cost: $54.75/ Month
Network and SSD Cost: $23.00/ Month
Google SQL Database: $51.49/ Month
Total Per Month: $177.75/ Month
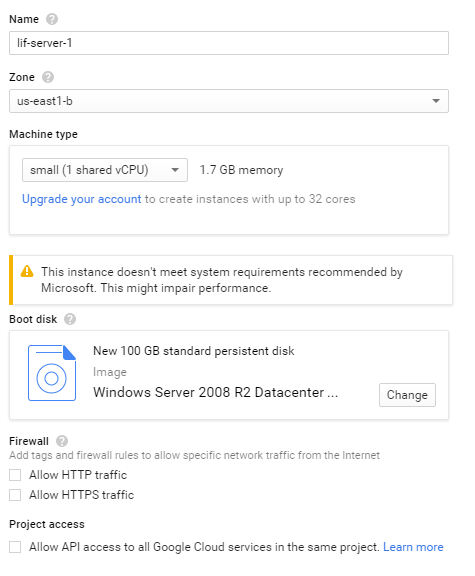
So the VM of Dedicated Server Instance comes with 3.75 GB of RAM,and 4 Cores. Something I have always enjoyed about Google Cloud is you can detach the disk, and move it to a larger machine if you want to ever upgrade.
First let me say, the Google SQL service is optional, and you can just install MariaDB on the VM directly, so that shaves off some cost right there.
So now, let's get into the details of what you need to do to get started

1. Go sign-up for Google Cloud (cloud.google.com), and make sure to click in the top right the button for "Free Trial" to get the $300 Free Credit to use.
2. Once you sign-in and sign-up for the Free Trial you can go to cloud.google.com and go to "Your Console".
3. Once inside your console you will need to go to the hamburger menu on the top left corner of the dashboard and then click Compute Engine.
4. Click Create a New Instance, this is either on the top bar or in the middle to active the engine.
5. In the set-up here is the layout for the Instance that worked for me. You can decide to go higher or lower with the selection of the Instance Machine Type, but it could hinder performance as Windows requires a lot more resources to run than let's say CentOS.
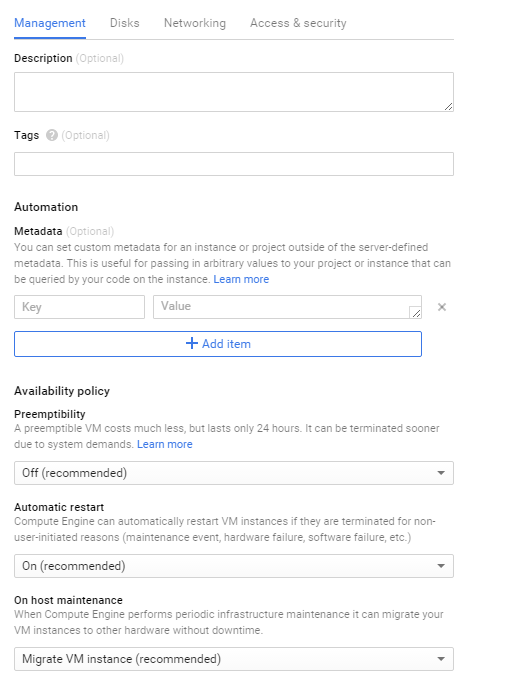
Next you will want to click on "Management, disk, networking, access & security options".
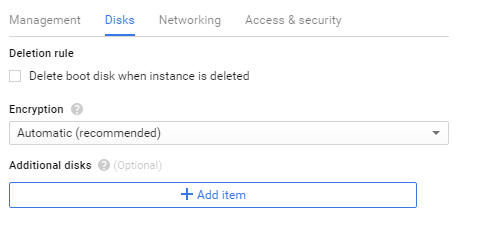
Make sure to match these settings to enable it to run a bit better, and to prevent losing the server.
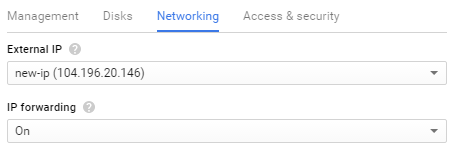
Make sure to select a New Static IP, a Ephemerial IP changes when the server reboots.
Now you can click create for the Instance and it will start and boot the server for the first time. While that is being set-up we can now work on the network set-up.
6. To begin the network set-up you will need to go to the menu in the top left, and click Networking.
Once you have done that, go to Firewall rules.
We are going to add a new rule to allow the server connections. Use the following settings on the new rule.
- Code: Select all
Network: default
Source filter: Allow from any source
Allowed protocols and ports:
tcp:28000-28002; udp:28000-28002; tcp:26001-26003; udp:26001-26003
7. Ok, now you have the network set-up to allow the traffic let's go back to the Compute Engine let's go back and login to the new Windows VM.
Click the menu in the top left again and go back to the Compute Engine, and now you should see your new instance there.
To login to it you will need to click the button on the right of the instance and click to download the RDP
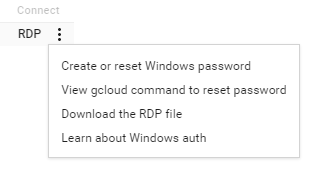
Before you download the RDP file make sure to click "Crate or Reset the Windows Password" as Google Cloud does not give you the password from the start.
Once you have done that...
Click the Download the RDP file, once you download that you can double click it on windows and it will boot you into the machine.
Congrats! You now have a instance on Google Cloud ready for LiF:YO!
If you want to use the Google SQL Engine, continue here. If not you are set and ready to start setting up your server like any other computer!
Google SQL Set-Up.
1. Go to the menu in the top left and click on the SQL button under Storage.
2. Once in this menu, you will want to create a new instance of the SQL Engine.
3. Select the First Generation, as the Second one will not work with LiF:YO.
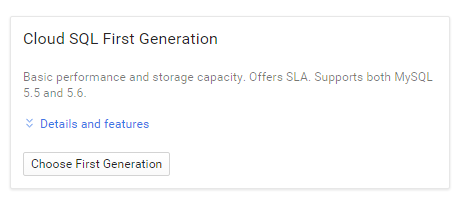
4. Configure the SQL Engine with the following.
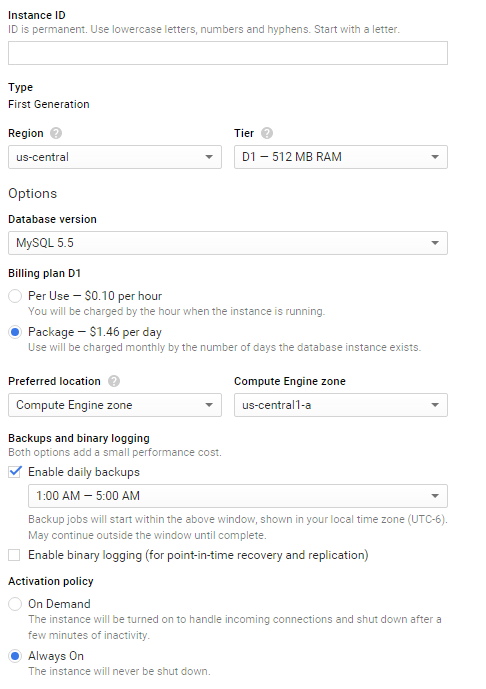
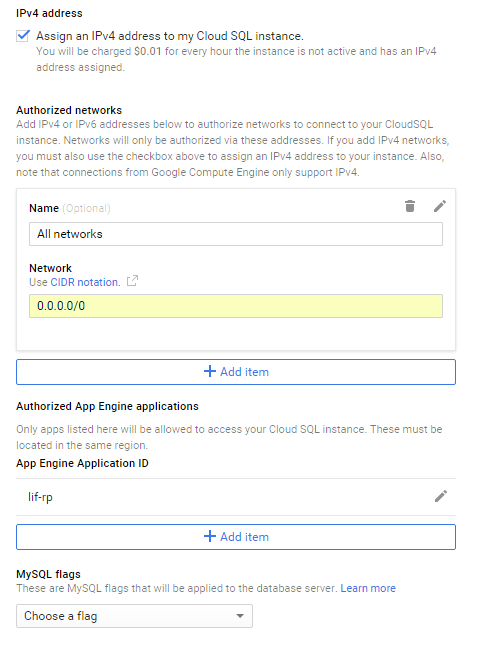
5. Create the SQL Instance
6. Once it is created you are going to go and edit it from the main SQL screen. You will need to add a root user to the SQL Engine, to do so do the following.
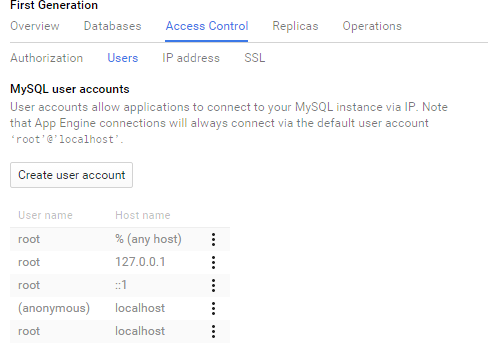
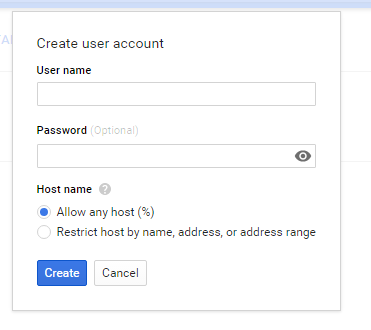
You can name the user what ever, as it will have root access. If you want you can also limit it to connections from the Compute Instance IP we set-up before.
7. The SQL Database is all Set-Up!
From here I recommend you follow the following tutorials! If you are using the google SQL Engine you do not need to worry about setting up a database, as you already have one on Google Cloud.
proper-dedicated-server-steps-t2015/
https://steamcommunity.com/sharedfiles/ ... =316928535
If you have any questions or problems make sure to post below and I would be happy to answer any of them!
- Zack
